Working with Pipelines using the Developer
You can use the Developer perspective of the OpenShift web console to create CI/CD pipelines for your software delivery process while creating an application on OpenShift Container Platform.
After you create pipelines, you can view and visually interact with your deployed pipelines.
| The .NET Core runtime is not yet supported by the pipeline templates. |
Prerequisites
-
You have access to an OpenShift Cluster and have logged in to the web console.
-
You have cluster administrator privileges to install operators and have installed the OpenShift Pipelines Operator.
-
You are in the Developer perspective.
-
You have created a project.
Creating applications with CI/CD pipelines
You can use the Import from git option in the Developer perspective to create an application with CI/CD Pipelines.
Procedure
-
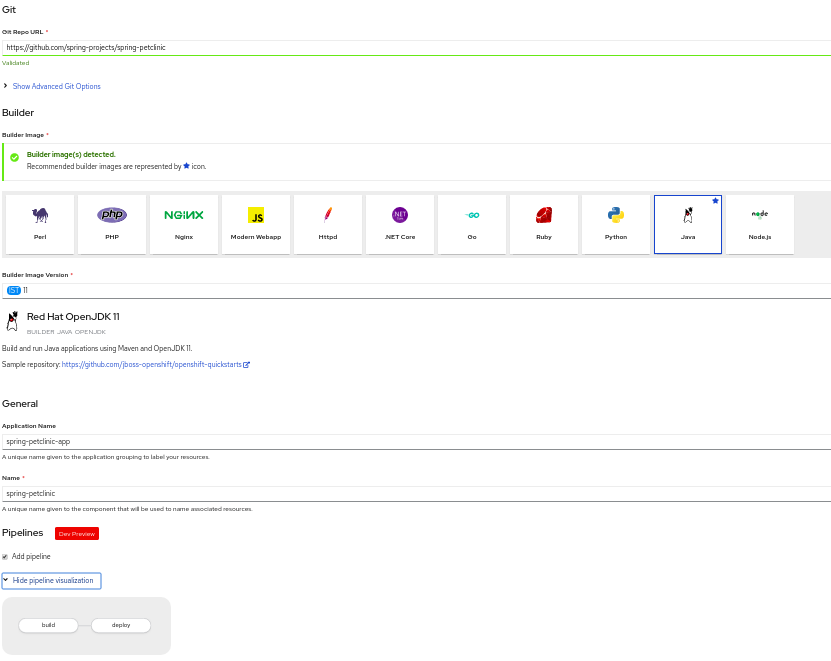
In the Add view, click From Git to see the Import from git form.
-
In the Git section, enter the following sample Git repository URL
https://github.com/spring-projects/spring-petclinicto create an application along with the required CI/CD pipelines. After the URL is validated, the recommended Java builder image for the codebase is automatically selected. -
In the General section:
-
In the Application Name field, enter a unique name for the application grouping.
-
The Name field is automatically populated based on the Git repository URL. This name is used to identify the resources created for this application.
-
-
In the Pipelines section, select Add Pipeline and click Show Pipeline Visualization to see the pipeline for the application runtime.
-
Retain the default values in the Resources section and the Advanced Options section.
-
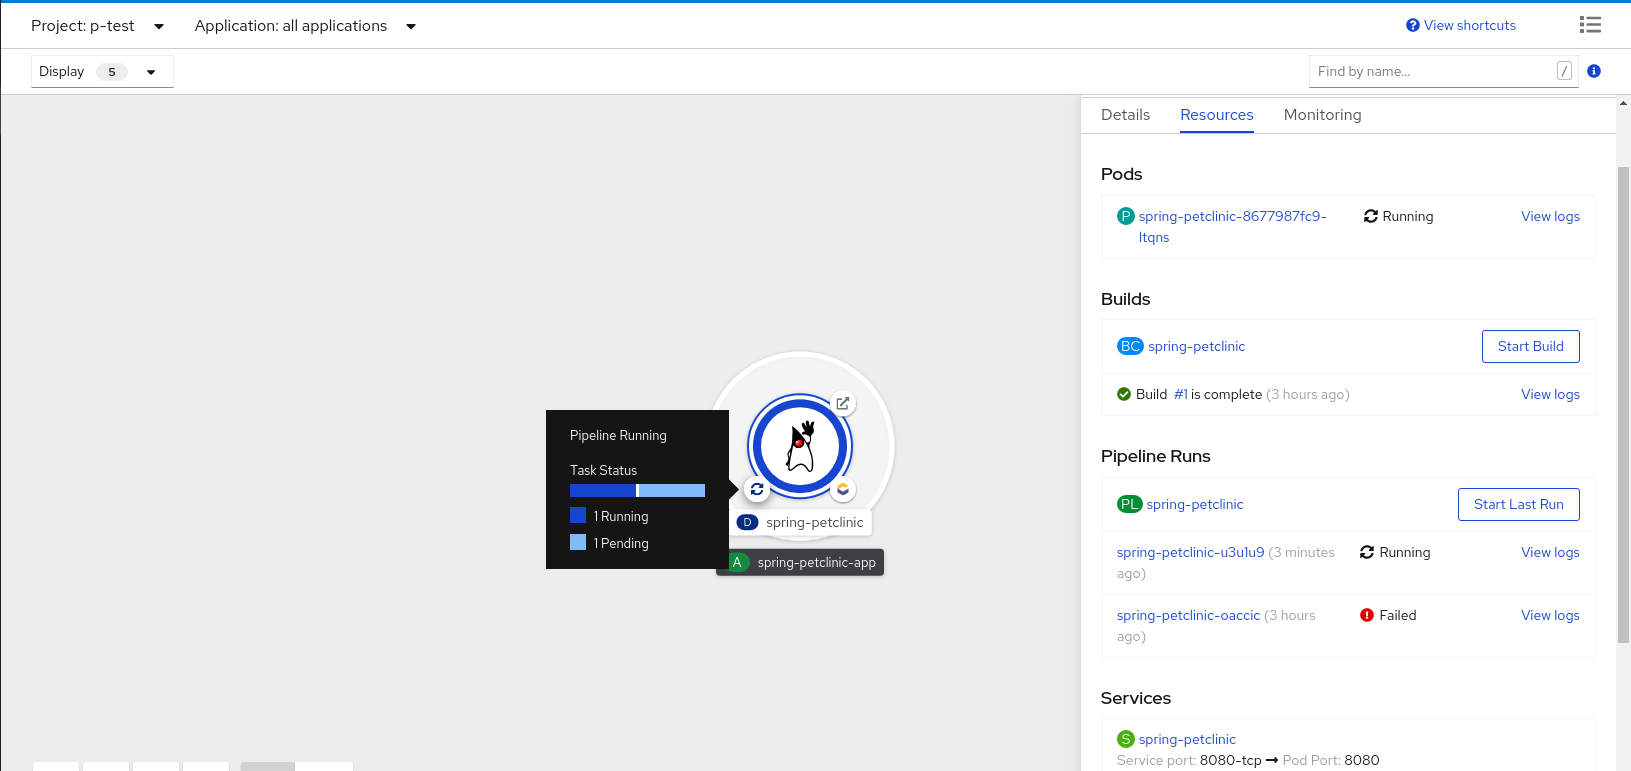
Click Create to create the application and see its build status in the Topology view.
-
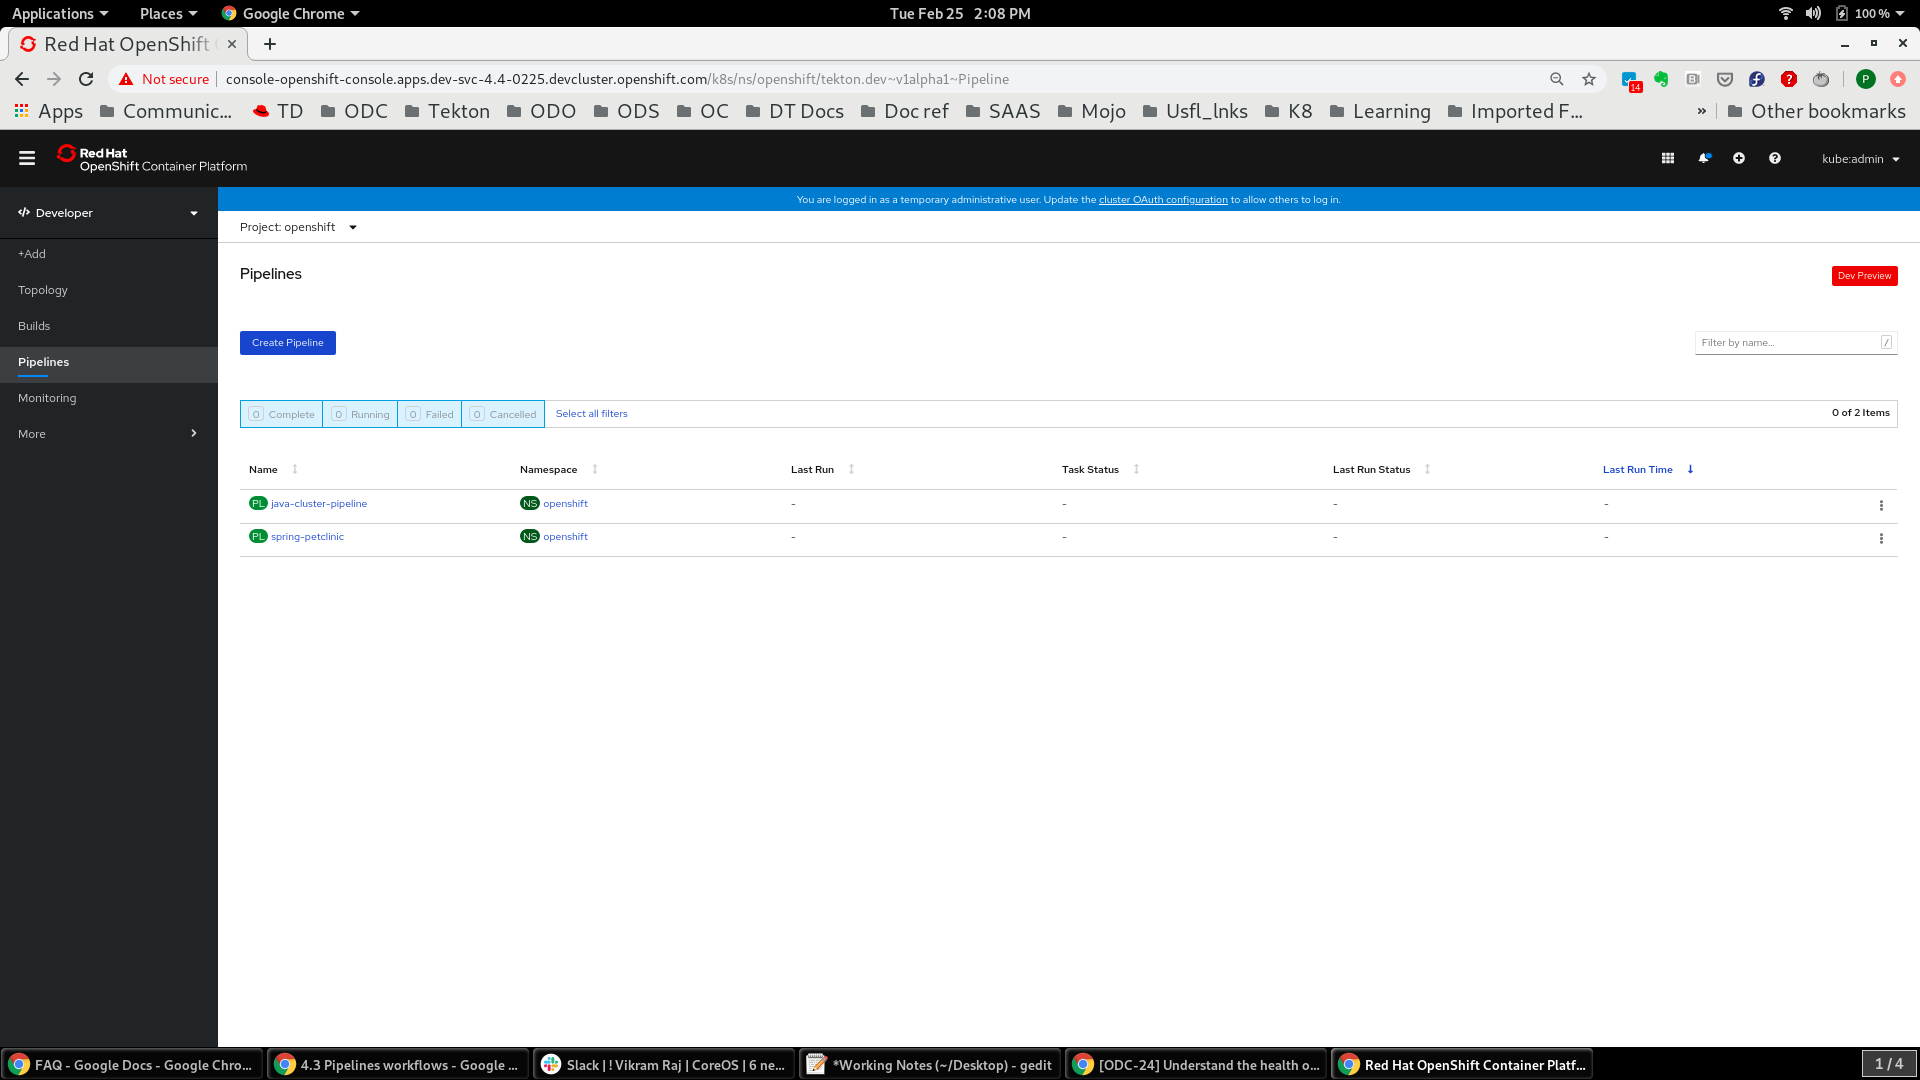
On the left navigation panel, click Pipelines to see the new pipeline listed in the Pipelines page.
Interacting with Pipelines using the Developer perspective
The Pipelines view in the Developer perspective lists all the pipelines in a project along with details, such as the namespace in which the pipeline was created, the last pipeline run, the status of the tasks in the pipeline run, the status of the pipeline run, and the time taken for the run.
Procedure
-
In the Pipelines view of the Developer perspective, select a project from the Project drop-down to see the pipelines in that project.
-
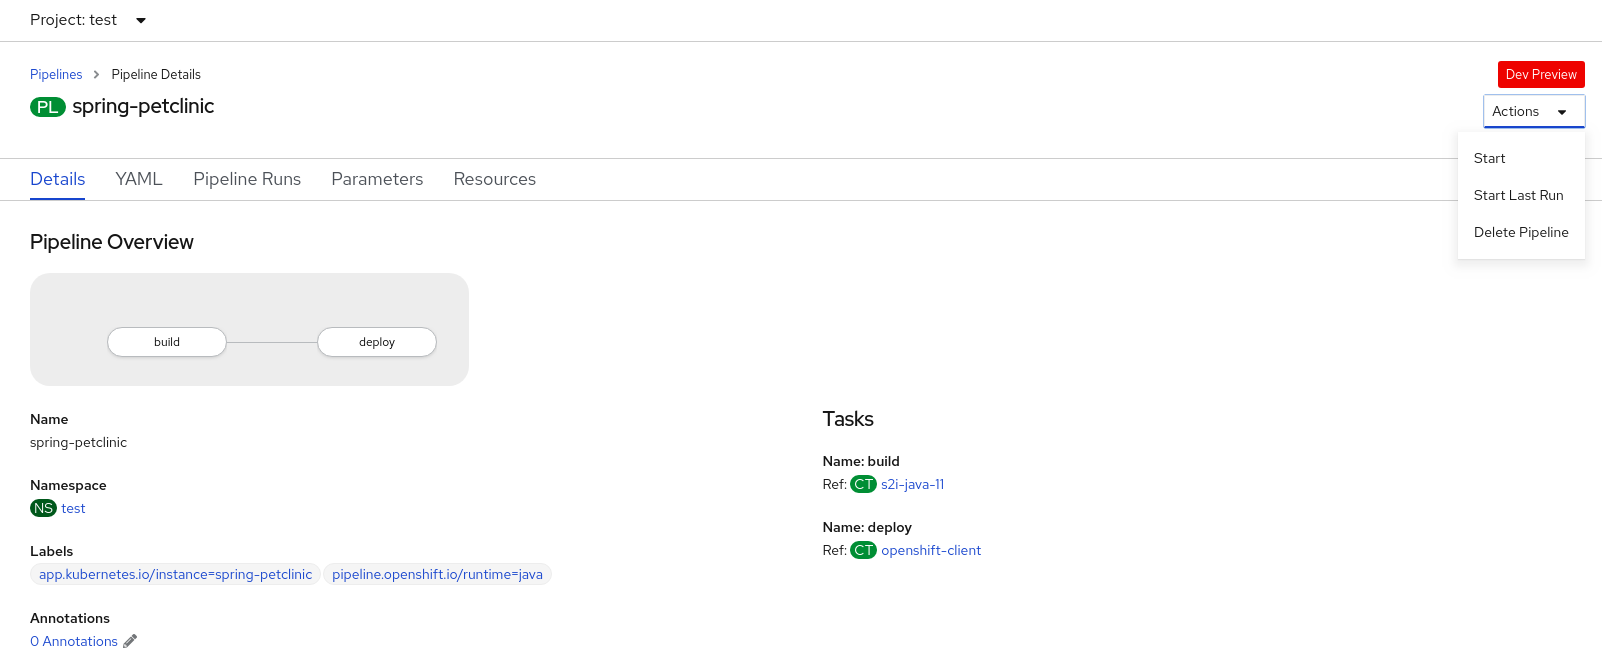
Click on the required pipeline to see the Pipeline Details page. It provides a visual representation of all the serial and parallel tasks in the pipeline. The tasks are also listed to the bottom-right of the page. You can click the listed Tasks to view the details of the task.
-
Optionally, in the Pipeline Details page :
-
Click Pipeline Runs tab to see the completed, running, or failed runs for the pipeline. You can use the Options menu (icon image) to: stop a running pipeline, rerun a pipeline using the same parameters and resources as that of the previous pipeline execution, or delete a pipeline run.
-
Click Parameters tab to see the parameters defined in the Pipeline. You can also add or edit additional parameters as required.
-
Click Resources tab to see the resources defined in the Pipeline. You can also add or edit additional resources as required.
-
-
Click Actions and select Start to start the pipeline. The Start Pipeline dialog box displays the Git Resources and the Image Resources based on the pipeline definition.
-
In the Parameters section, enter a unique name in the
IMAGE_NAMEfield. -
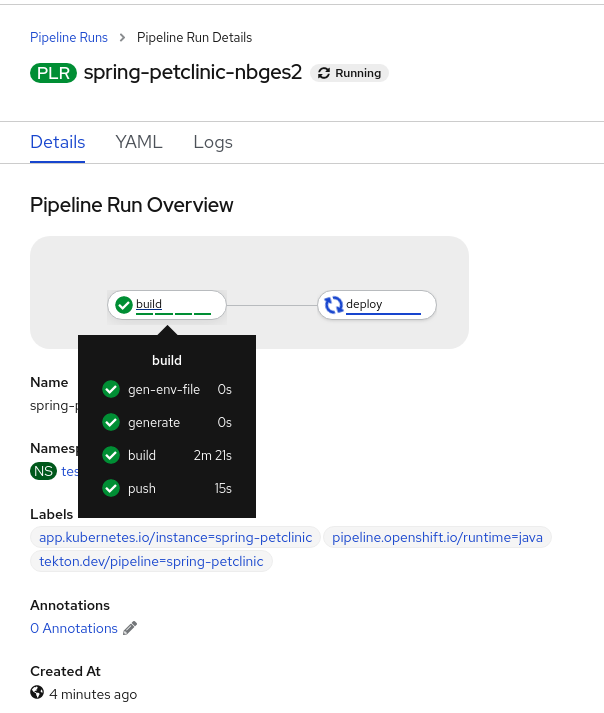
Use the drop-downs to select or create the required resources to customize the pipeline as required. For this example, retain their default values and click Start to start the pipeline run. After the pipeline starts, the tasks are executed sequentially in the Pipeline.
-
-
The Pipeline Run Details page displays the pipeline being executed. You can:
-
Hover over the tasks to see the time taken for the execution of each step.
-
Click on a task to see logs for each of the steps in the task.
-
Click the Logs tab to see the logs as per the execution sequence of the tasks and use the Download button to download the logs to a text file.
-
-
On the left navigation panel, click Topology and click on the application to see the pipeline runs listed in the right panel.
-
In the Pipeline Runs section, click Start Last Run to start a new pipeline run with the same parameters and resources as the previous ones. This option is disabled if a pipeline run has not been initiated.
-
In the Topology page, hover to the left of the application to see the status of the pipeline run for the application.